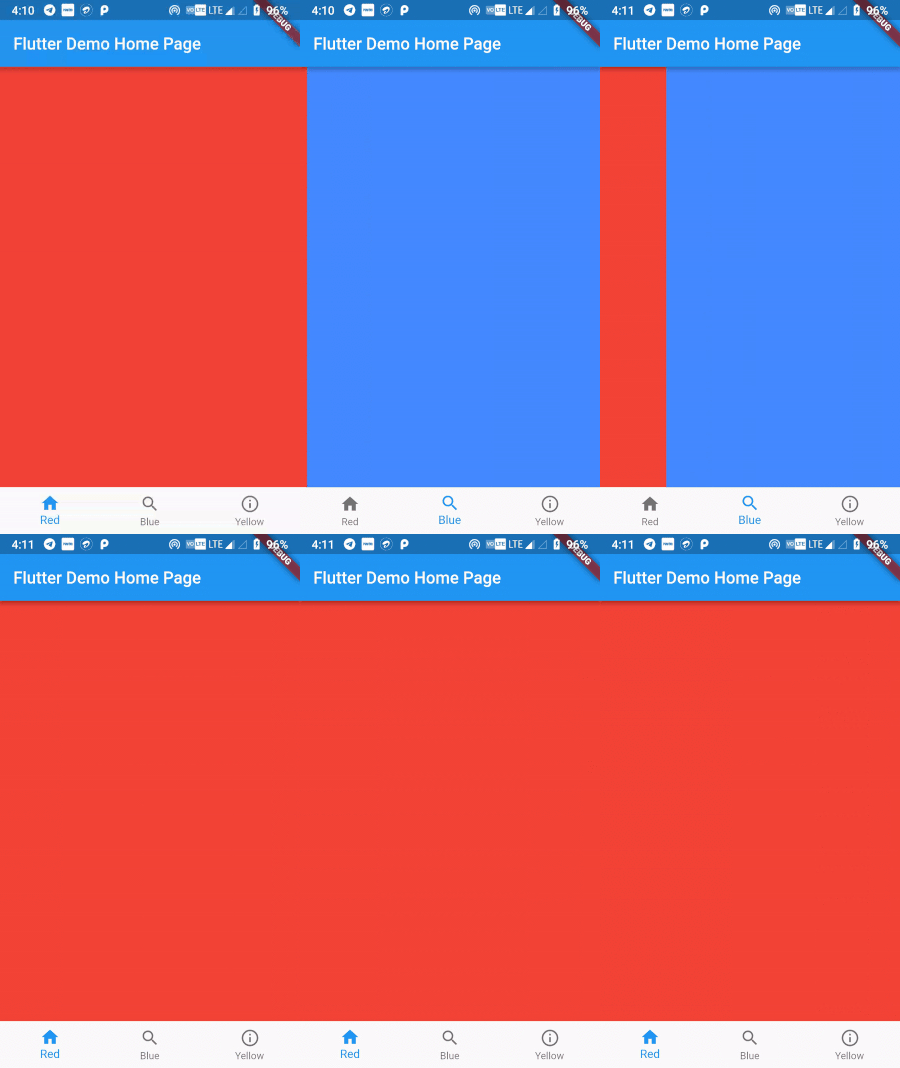
PageView和BottomNavigationBar结合使用

参考英文地址:Flutter — PageView with BottomNavigationBar

你可能早已经使用过BottomNavigation和PageView。

现在,我们将要一起使用这个两个组件。

第一步

创建一个BottomNavigationBar和三个BottomNavigationBarItem

这个BottomNavigationBar用于在应用的底部展示,用于视图的选择,通常大多是3个到5个之间,底部导航常由文本标签、图标或两者兼有的多种形式的项组成,提供了应用底层视图之间的快速导航,这个底部导航常常与 Scaffold配合使用,这个脚手架提供了Scaffold.bottomNavigationBar 参数。

底部导航栏类型决定了这些导航项如何展示,如果没有指定,当少4个的时候,自动设置为 BottomNavigationBarType.fixed,如果 fixedColor 指定了,将以该颜色渲染选中的导航项,未指定将会使用ThemeData.primaryColor,导航栏的背景色,默认为(ThemeData.canvasColor)Material的背景色(不透明白色),当大于等于4个的时候,设置为BottomNavigationBarType.shifting ,所有的导航项被渲染为白色,导航栏的背景色与选中导航项的背景色一致,会fixed不同的是,每点击一导航项,会有一个动画效果。

这个BottomNavigationBarItem类很少单独使用。通常嵌入在上面的一个底部导航小部件中。

1
2
3
4
5
6
7
8
9
10
11
12
13
14
15
16
17
18
19
20
21
22
23
24
25
26
27
28
29
30
31
32
int bottomSelectedIndex = 0;

List<BottomNavigationBarItem> buildBottomNavBarItems() {
return [
BottomNavigationBarItem(
icon: new Icon(Icons.home),
title: new Text('Red')
),
BottomNavigationBarItem(
icon: new Icon(Icons.search),
title: new Text('Blue'),
),
BottomNavigationBarItem(
icon: Icon(Icons.info_outline),
title: Text('Yellow')
)
];
}

@override
Widget build(BuildContext context) {
return Scaffold(
appBar: AppBar(
title: Text(widget.title),
),
body: Container(),
bottomNavigationBar: BottomNavigationBar(
currentIndex: bottomSelectedIndex,
items: buildBottomNavBarItems(),
),
);
}

第二步

使用3个状态组件创建PageView。

PageView是按页展示的滚动列表。

页面视图的子组件被强制与视图窗口的大小保持一致,你可以使用PageController来控制在这个视图中可见的页面,视窗。

您可以使用PageController来控制哪个页面在视图中可见。除了能够控制PageView中内容的像素偏移量之外,PageController还允许您以页面的形式控制偏移量,即以视图窗口大小为增量。

PageController也用于控制PageController.initialPage,它决定了在初次构造PageView时显示哪个页面,以及PageController,以及PageController.viewportFraction,它决定了页面大小占视窗大小的百分比,keepPage参数决定了是否使用PageStorage 保存当前页面。

第一个页面,red.dart

1
2
3
4
5
6
7
8
9
10
11
12
13
14

class Red extends StatefulWidget {
@override
_RedState createState() => _RedState();
}

class _RedState extends State<Red> {
@override
Widget build(BuildContext context) {
return Container(
color: Colors.red,
);
}
}

第二个页面,blue.dart

1
2
3
4
5
6
7
8
9
10
11
12
13
class Blue extends StatefulWidget {
@override
_BlueState createState() => _BlueState();
}

class _BlueState extends State<Blue> {
@override
Widget build(BuildContext context) {
return Container(
color: Colors.blueAccent,
);
}
}

第三个页面,yellow.dart

1
2
3
4
5
6
7
8
9
10
11
12
13
class Yellow extends StatefulWidget {
@override
_YellowState createState() => _YellowState();
}

class _YellowState extends State<Yellow> {
@override
Widget build(BuildContext context) {
return Container(
color: Colors.yellowAccent,
);
}
}

我们需要传入PageController来控制初始化选择的页面,以及手动地从一个导航到另一页面。

1
2
3
4
5
6
7
8
9
10
11
12
13
14
15
16
17
18
19
20
21
22
23
PageController pageController = PageController(
initialPage: 0,
keepPage: true,
);

Widget buildPageView() {
return PageView(
controller: pageController,
onPageChanged: (index) {
pageChanged(index);
},
children: <Widget>[
Red(),
Blue(),
Yellow(),
],
);
}

@override
void initState() {
super.initState();
}

build方法体中调用buildPageView

1
2
3
4
5
6
7
8
9
10
11
12
13
@override
Widget build(BuildContext context) {
return Scaffold(
appBar: AppBar(
title: Text(widget.title),
),
body: buildPageView(),
bottomNavigationBar: BottomNavigationBar(
currentIndex: bottomSelectedIndex,
items: buildBottomNavBarItems(),
),
);
}

第三步

我们需要做一些技巧来管理PageViewBottomNavigationBar的同步。

在当前应用程序中的状态中,有两个问题:

  1. 当我们滑动导航栏时,它的选择不会改变。
  2. 当我们选择其他的底部导航栏项时,我们的页面视图不会滚动。

为了解决第一问题,我们可以使用由PageView提供的onPageChanged事件。

1
2
3
4
5
6
7
8
9
10
11
12
13
14
15
16
17
18
19
void pageChanged(int index) {
setState(() {
bottomSelectedIndex = index;
});
}

Widget buildPageView() {
return PageView(
controller: pageController,
onPageChanged: (index) {
pageChanged(index);
},
children: <Widget>[
Red(),
Blue(),
Yellow(),
],
);
}

onPageChanged事件将会给我们当前页面的索引,我接受到页面索引在setState中设置bottomSelectedIndex索引,这样我们的底部的选择就会自动变化。

现在修复第二个问题,如果我们选择任意的BottomNavigationBarItem,然后我们的PageView应该自动滑动,为了修复这个问题,我们需要使用BottomNavigationBaronTap事件。

1
2
3
4
5
6
7
8
9
10
11
12
13
14
15
16
17
18
19
20
21
22
23
24

void bottomTapped(int index) {
setState(() {
bottomSelectedIndex = index;
pageController.animateToPage(index, duration: Duration(milliseconds: 500), curve: Curves.ease);
});
}

@override
Widget build(BuildContext context) {
return Scaffold(
appBar: AppBar(
title: Text(widget.title),
),
body: buildPageView(),
bottomNavigationBar: BottomNavigationBar(
currentIndex: bottomSelectedIndex,
onTap: (index) {
bottomTapped(index);
},
items: buildBottomNavBarItems(),
),
);
}

类似于onPageChanged事件,onTap事件也为我们提供了当前触碰的一个索引,这样基于这个索引设置bottomSelectedIndex,然后使用pageController.animateToPage移动选中的页面,其接受三个参数,indexduationcurve,返回一个future

1
pageController.animateToPage(index, duration: Duration(milliseconds: 500), curve: Curves.ease);

最终的main.dart文件如下:

1
2
3
4
5
6
7
8
9
10
11
12
13
14
15
16
17
18
19
20
21
22
23
24
25
26
27
28
29
30
31
32
33
34
35
36
37
38
39
40
41
42
43
44
45
46
47
48
49
50
51
52
53
54
55
56
57
58
59
60
61
62
63
64
65
66
67
68
69
70
71
72
73
74
75
76
77
78
79
80
81
82
83
84
85
86
87
88
89
90
91
92
93
94
95
96
97
98
99
100
101
102
103
104
105
106
107
108
109
110
111
112
113
114
115
116
117
118
119
120
121
122
123
124
125
126
127
128
129
130
131
132
133
134
135
136
137
138
139
140
141
142
143
144
145
146
147

import 'package:flutter/material.dart';

void main() => runApp(MyApp());

class MyApp extends StatelessWidget {
// This widget is the root of your application.
@override
Widget build(BuildContext context) {
return MaterialApp(
title: 'Flutter Demo',
theme: ThemeData(
primarySwatch: Colors.blue,
),
home: MyHomePage(title: 'Flutter Demo Home Page'),
);
}
}

class MyHomePage extends StatefulWidget {
MyHomePage({Key key, this.title}) : super(key: key);

final String title;

@override
_MyHomePageState createState() => _MyHomePageState();
}

class _MyHomePageState extends State<MyHomePage> {

int bottomSelectedIndex = 0;

List<BottomNavigationBarItem> buildBottomNavBarItems() {
return [
BottomNavigationBarItem(
icon: new Icon(Icons.home),
title: new Text('Red')
),
BottomNavigationBarItem(
icon: new Icon(Icons.search),
title: new Text('Blue'),
),
BottomNavigationBarItem(
icon: Icon(Icons.info_outline),
title: Text('Yellow')
)
];
}

PageController pageController = PageController(
initialPage: 0,
keepPage: true,
);

Widget buildPageView() {
return PageView(
controller: pageController,
onPageChanged: (index) {
pageChanged(index);
},
children: <Widget>[
Red(),
Blue(),
Yellow(),
],
);
}

@override
void initState() {
super.initState();
}

void pageChanged(int index) {
setState(() {
bottomSelectedIndex = index;
});
}

void bottomTapped(int index) {
setState(() {
bottomSelectedIndex = index;
pageController.animateToPage(index, duration: Duration(milliseconds: 500), curve: Curves.ease);
});
}

@override
Widget build(BuildContext context) {
return Scaffold(
appBar: AppBar(
title: Text(widget.title),
),
body: buildPageView(),
bottomNavigationBar: BottomNavigationBar(
currentIndex: bottomSelectedIndex,
onTap: (index) {
bottomTapped(index);
},
items: buildBottomNavBarItems(),
),
);
}
}


class Red extends StatefulWidget {
@override
_RedState createState() => _RedState();
}

class _RedState extends State<Red> {
@override
Widget build(BuildContext context) {
return Container(
color: Colors.red,
);
}
}

class Blue extends StatefulWidget {
@override
_BlueState createState() => _BlueState();
}

class _BlueState extends State<Blue> {
@override
Widget build(BuildContext context) {
return Container(
color: Colors.blueAccent,
);
}
}

class Yellow extends StatefulWidget {
@override
_YellowState createState() => _YellowState();
}

class _YellowState extends State<Yellow> {
@override
Widget build(BuildContext context) {
return Container(
color: Colors.yellowAccent,
);
}
}